
This post contains affiliate links.
Cold and flu season is upon us once again and searches for natural chest decongestants and homemade vapor rubs are on the rise. The beginnings of a cold – the congestion, achy body and head, runny nose – always have me reaching for a green smoothie. Once that cold has taken residence, I have to ride it out. Bleh.
Creating this DIY vapor rub has helped my family so much over the years and I’d love for it to become a staple in your home, too.
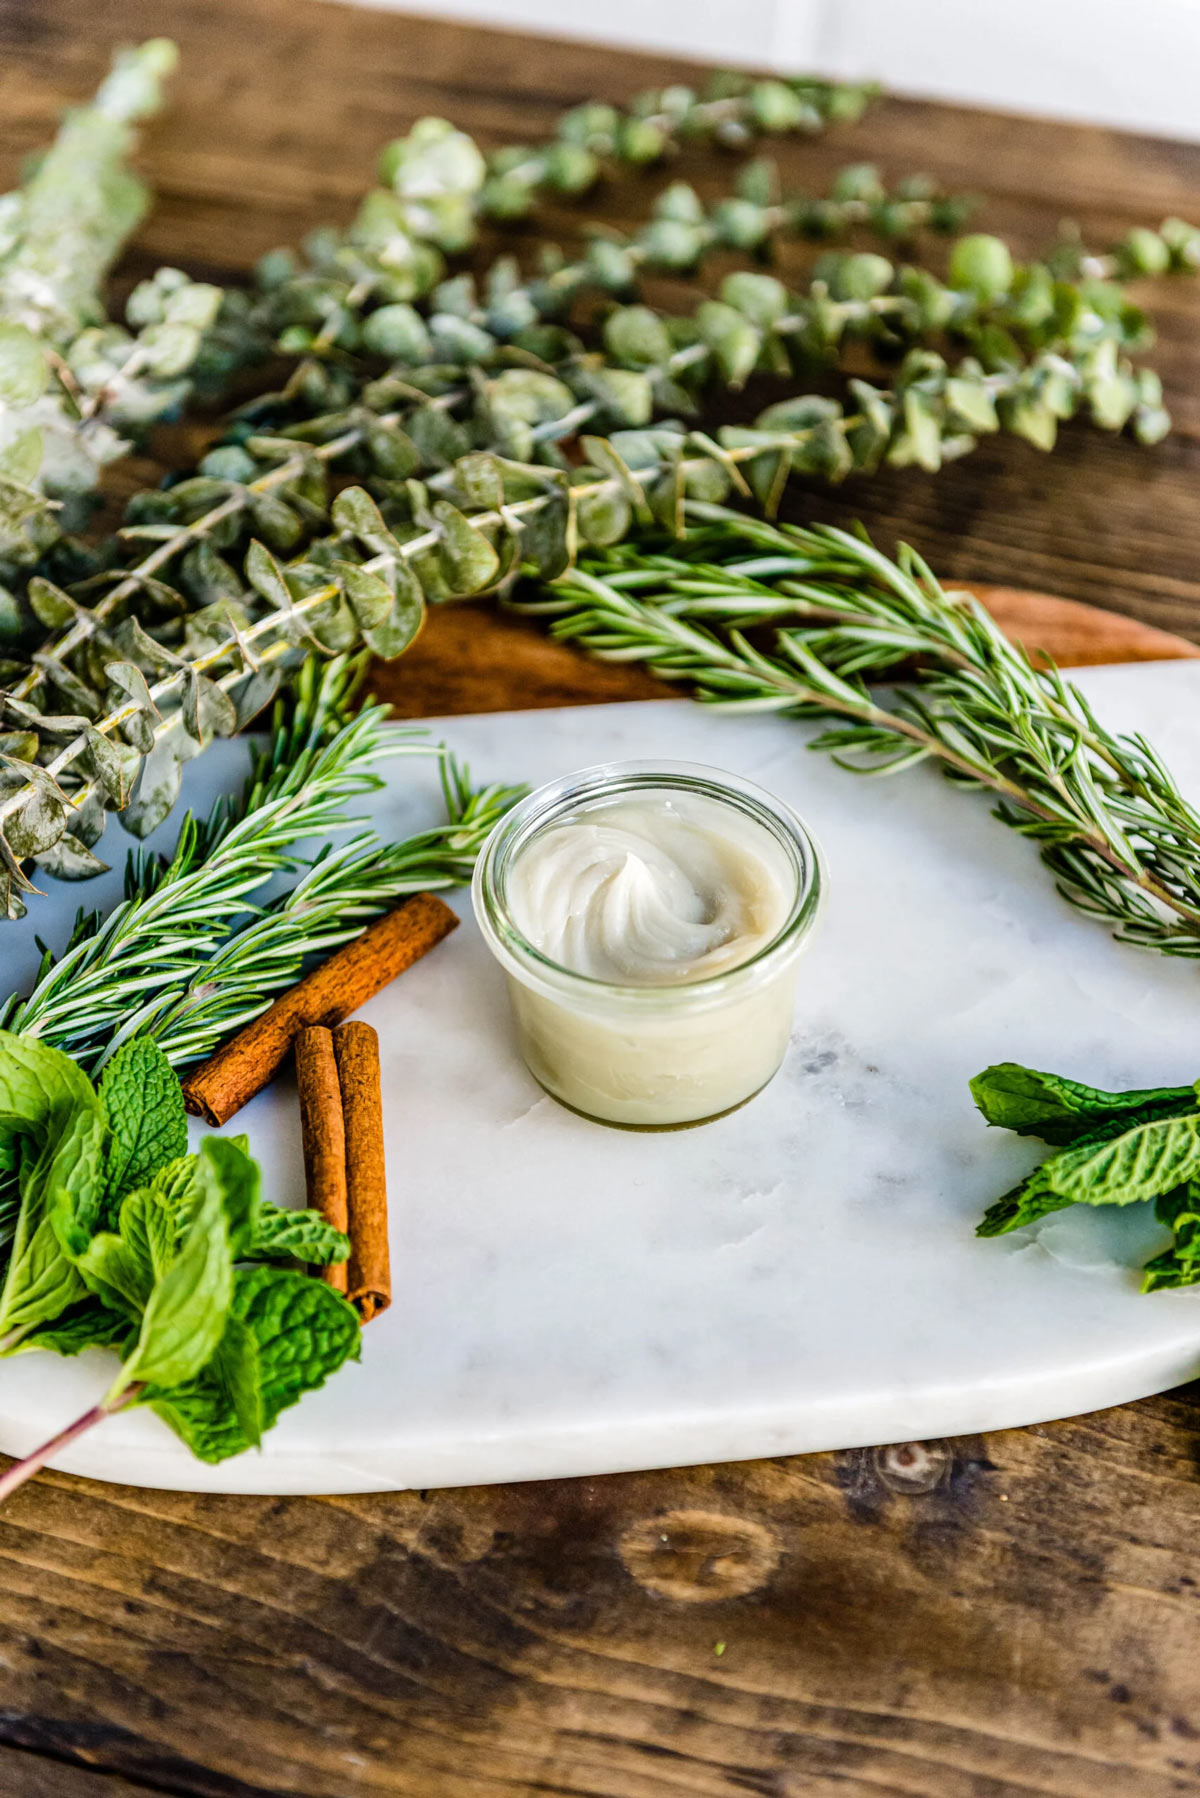
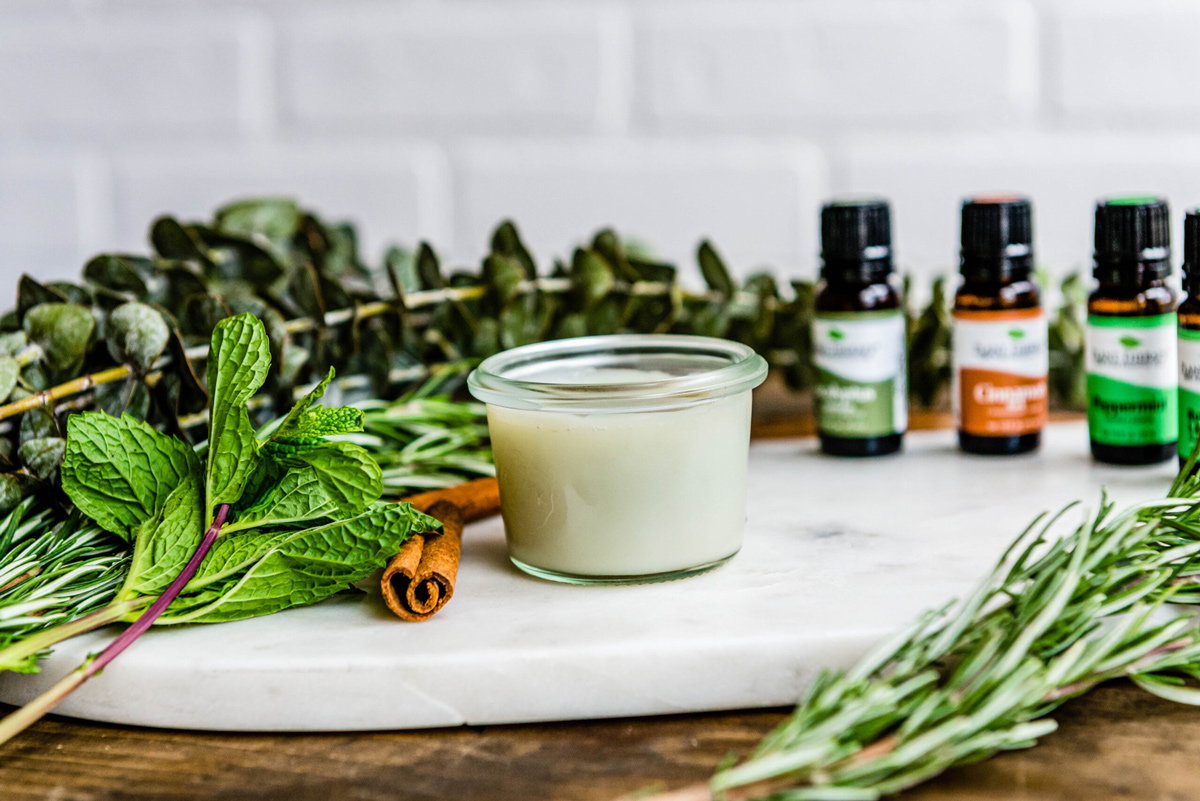
One of the most uncomfortable parts of being sick is chest and sinus congestion. I had to take action! This homemade vapor rub is made with all-natural ingredients that you should be able to easily find.
Table of Contents
Recipe Ingredients
I don’t buy a vapor chest rub anymore. I make it! It’s easy, but the real benefit comes from knowing you are using something natural rather than a concoction of unsafe chemicals and icky things. Here’s what I put in mine.
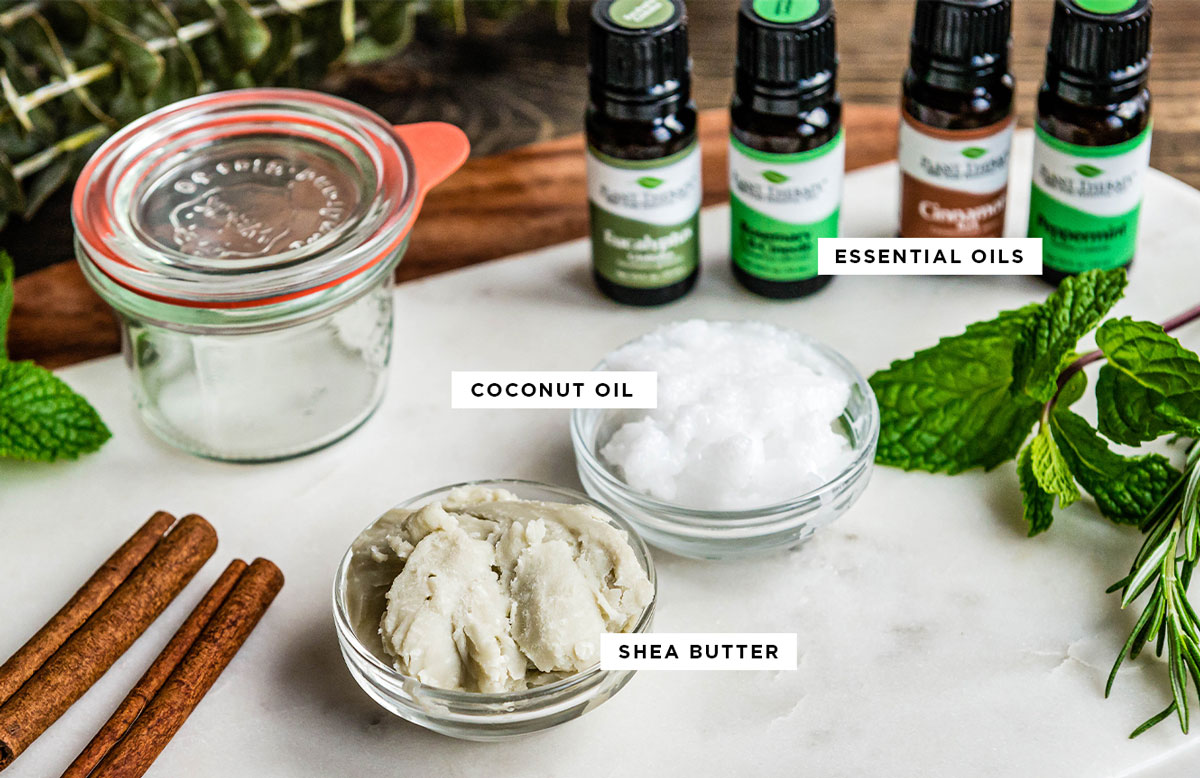
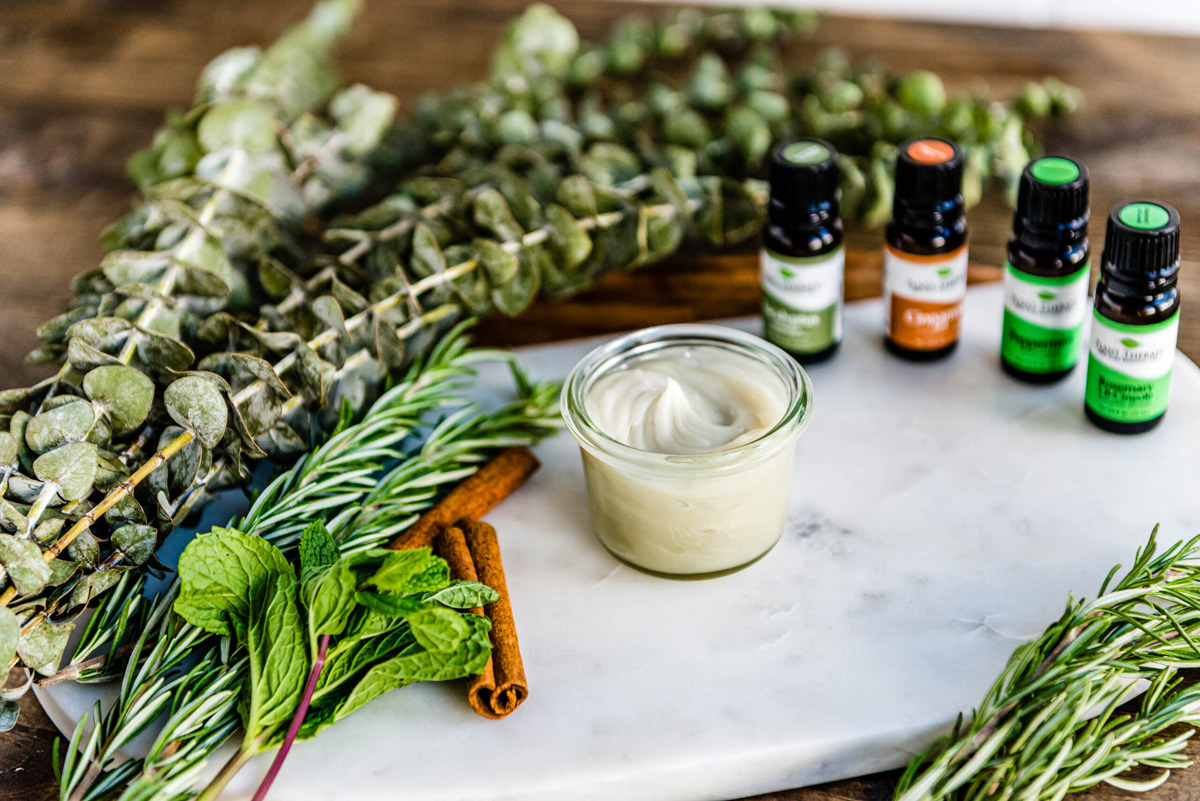
- Coconut oil: This is used as a carrier oil in this recipe, as well as super moisturizing on the skin.
- Shea butter: Helps to thicken up the salve as well as provide moisture.
- Essential oils: Eucalyptus, peppermint, rosemary and cinnamon oils are mixed together as they are naturally designed to promote healing as well as soothe swollen tissues. This allows for you to breathe easier while fighting congestion from a cold or allergies.
**Note that different oils should not be used on young children. Adjust the recipe accordingly depending on who needs relief.
Natural Decongestants vs Store-Bought
Store-bought medicines may contain unsafe chemicals and even ‘natural ingredients’ can be processed. Always read labels, even on more natural-looking brands, as these can sneak in ingredients that aren’t necessary and are harmful. According to the Mayo Clinic, popular store-bought options contain toxic ingredients.
Even though it is a topical treatment, these chemicals are absorbed through the skin. This means they can still cause harm even if they aren’t ingested. I’ll stick to ingredients I know are safe, and a natural chest decongestant recipe that actually works!
How to Make Homemade Vapor Rub
This recipe is super quick to make and one recipe should last you all season!
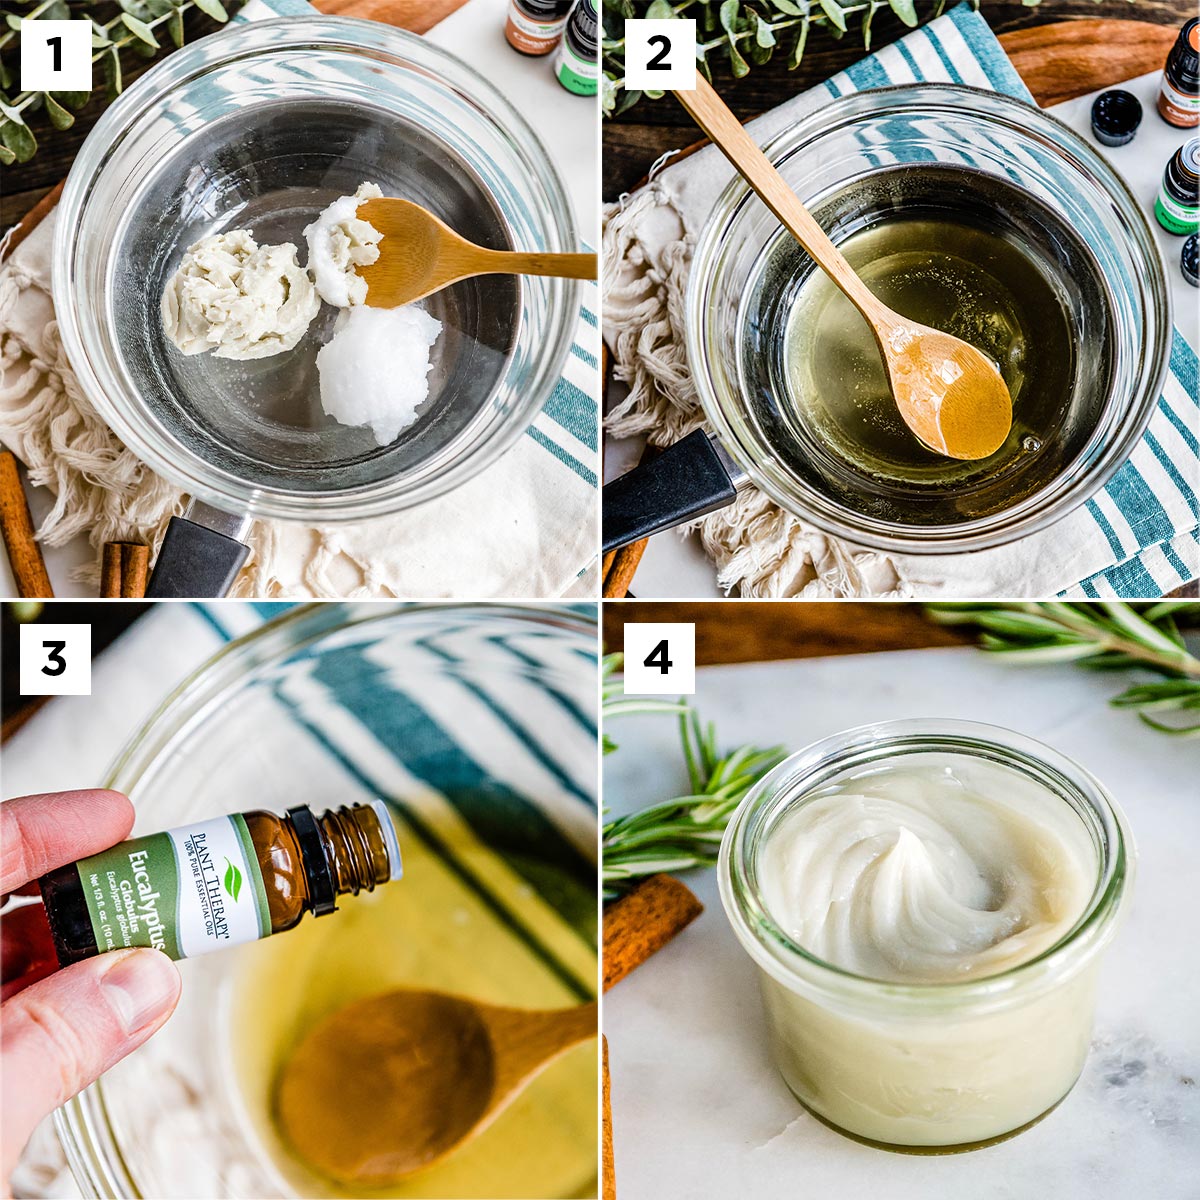
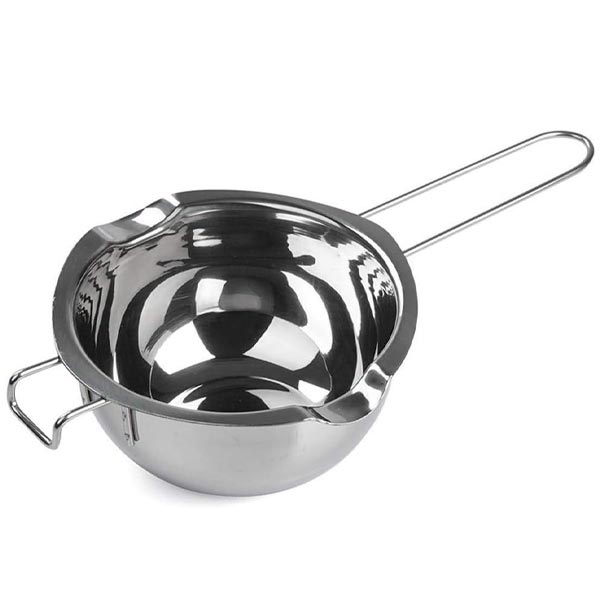
- Start by melting the coconut oil and shea butter in a double boiler (or a heat-safe bowl over boiling water).
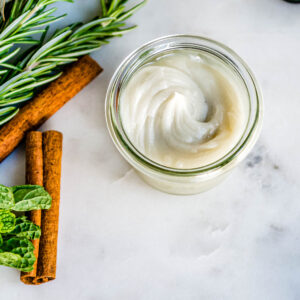
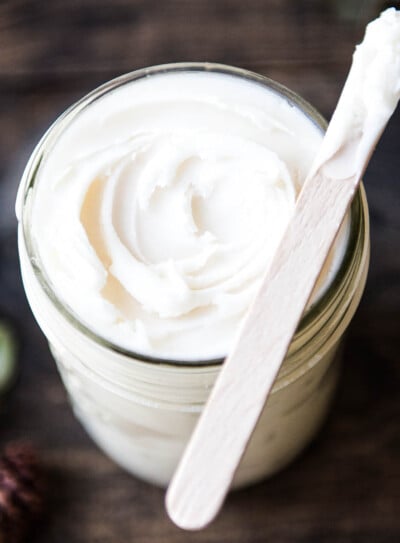
- Once these ingredients are completely melted, remove from heat and transfer to a heat-safe jar with a tight-fitting lid. Add the essential oils and mix to combine. Then let the mixture cool down and solidify completely.
- Store in an airtight container until ready to use. This has a shelf life of about six months.
- When you’re ready to use, scoop out a small amount with clean hands. Apply gently over the chest area and feet (if desired). I recommend wearing an old t-shirt and thick socks when using this product so that the oil doesn’t stain bedding or any other surfaces.
Note: After the application of my natural decongestant, be sure to wash your hands with a carrier oil (not just water). I like to use coconut oil, yet olive oil is a great one as well. This helps get any essential oil remnants off of your hands so that you don’t rub them into your eyes inadvertently.
FAQs
My recipe uses coconut oil as the carrier oil and pairs it with shea butter and a variety of other essential oils designed to open up your passageways for easier breathing as well as calm inflammation in the sinuses. Melt down the butter and oil then add the essential oils and let cool until it becomes solid once more. Then use as needed!
Yes! It’s super easy and this way you know exactly what’s going on in your body. Grab coconut oil, shea butter and the essential oils in my recipe and get ready to make your own.
I use this natural remedy as a natural chest decongestant by rubbing it on my chest and feet. The essential oils in it will help calm down inflammation in your sinuses and encourage drainage to help you breathe better during cold and flu season. I also use it after marathons and long trail runs to help get my breath back and loosen up the congestion that comes.
More Natural Decongestants
When a cold or flu hits and congestion sets in, I use all the tools I’ve got to get rid of it quickly and naturally. Here are some of my favorite natural chest decongestants:
- Humidifier: This is a super simple way to add moisture into the air, which helps your ability to breathe. I keep one in each of my kid’s rooms so they can use it whenever they feel stuffy.
- Saline nasal rinse: I was a bit skeptical about pouring salt water into my nose until I tried it. This is a great way to relieve pressure, push out snot and open your sinuses.
- Spicy food: Seriously! I love spice, and use it liberally when I start to feel congested.
- Diffusing essential oils: Specific scents can help calm the mind and body and help you breathe better. I love the brand Plant Therapy, because its products are USDA Organic and top quality. This natural decongestant is going onto your body so using good ingredients is essential.
Don’t forget to rate and review this recipe once you’ve tried it. I’d love to know how it compares to other decongestants you use!
More Natural Remedies
I don’t want to use something unless it works, and I love when I find natural remedies that work better than over-the-counter medicines. I’ve used these recipes for years and share them with everyone I know.
We should all feel empowered to take control of our health and do it through plants. Check out more rawkstar recipes like my natural chest decongestant and share them with your family too!
- Homemade fire cider: Kick that cold to the curb before it starts.
- Ginger lemon honey tea: A soothing tea the whole family can turn to for comfort.
- Homemade elderberry syrup: My school year staple for keeping my kids as healthy as possible.
- Ginger switchel: Knock out hot flashes with this age-old remedy.
- Golden milk: Fight inflammation naturally with a soothing latte.
- Homemade deodorant: The #1 rated natural deodorant recipe that actually works.
- Homemade toothpaste: Save your teeth and your sanity with this tasty paste.
- DIY lip scrub: Soft, lovely lips in no time with a little self-care treatment.
Do you have some favorite natural remedies you swear by? Let me know in the comments after you try this recipe and rate it. I’d love to try them too!
Homemade Vapor Rub
Ingredients
- 2 tablespoon coconut oil, unrefined
- 2 tablespoon shea butter
- 10 drop eucalyptus oil for ages 3+, use only 3 drops for children
- 10 drop peppermint oil for ages 3+, use only 3 drops for children
- 4 drop rosemary oil for use in ages 10+
- 4 drop cinnamon oil when making to use for children, use cinnamon leaf instead
Instructions
- In a double boiler, gently melt coconut oil and shea butter. Remove from heat and let cool for a few minutes.
- Stir in the essential oils. Pour into a clean container with tight-fitting lid. Allow to solidify and cool completely before using.
- Store in a cool, dry place for up to six months. To use, rub a small amount between the palms to soften and apply to the chest as needed.
Notes
- Eucalyptus and peppermint oils should only be used in ages 3+ and in very small amounts.
- If making for children, use Peppermint and Eucalyptus essential oils.
- Other oils that can be beneficial for a children’s vapor rub are lavender, tea tree, spruce and pine.
- You can find essential oils at your local health food store or at https://www.planttherapy.com/.


Thank you so much for this recipe. My husband has a degenerative kidney disease that he has been dealing with since he was a kid. Eucalyptus oil is something we have to stay away from. Can you recommend another combination of oils that we could use for the vapor rub.
Hi Shawna! You could substitute the eucalyptus for more peppermint oil or could add more of each of the other oils listed in the recipe.
Just made a batch of this as my family is all coming down with colds. A little goes a long way when applying it at night (it’s strong!) and it definitely helped open up my sinuses so I could breath through the night.
Hi Erin! So glad you found this helpful! Fingers crossed and knocking on wood, I haven’t needed it yet this year but I have my recipe ready!
Thankyou so much for this article.
I went natural several years ago, and often use cinnamon, basil, ginger and lemon thyme in teas.
I grow alot of these herbs myself.
Question on your rub…
What could I use instead of coconut oil, il allergic to coconut.
Thankyou
In advance
Donna Jones
Donnalou4490@yahoo.com
That’s so awesome that you went natural with your products and even grow your own herbs. You could def swap in olive or avocado oil if you like.
Hi, I was just wondering what your thoughts were on camphor? It’s something my mom used on all of us when we were congested or had a cold. (It was not applied topically. She used to put a small piece in a cloth sack and used a diaper pin to fasten it to our gowns). Thank you!
That’s a great thought Angel! Plant Therapy’s white camphor oil would be a great one to use in this natural decongestant recipe. You could try swapping out the rosemary oil for camphor. Thanks for the share! 🙂
How much coconut oil do you use as it is not listed.
If you scroll to the bottom where it says “Ingredients” you will see the measurements. This recipe calls for 2 tablespoons of coconut oil.
Hope that helps!
My family has been using this recipe for YEARS now and love it. It’s got a much more therapeutic scent to it and really opens the airways.
I think you’ve done a great job presenting this, but I do want to mention: 5 years is really too long to keep using a batch of this with these oils in it. Eucalyptus for example, even stored in ideal conditions (cool, dark, sealed tight) has a 3 year or so max shelf life. Past that you risk nasty dermal irritation. It’s not a clear cut “definitely as of now” but it’s more likely as it ages and it’s not pleasant. I would encourage you to make a smaller batch every year or two. That aside, this looks lovely.
Thanks for your feedback + expertise Aimee. Can you tell me more about your work with essential oils? I’d love to learn more!
I’m happy to talk to you and help any way I can. I have practiced Herbalism for more than 30 years. I have used essential oils for several years as well, and started to pursue education so that I could help people and most of all, help people understand the nuances of safety issues surrounding them. I am currently enrolled in a NAHA and AIA certified school, on my way to becoming a certified aromatherapist. I have completed my 159 hour course work and final (thus my school’s certificate of EO Specialist) and am still working on my case studies and research paper. I have also already taken several more elective courses, which will eventually count toward my advanced scholar program (oh so many goals!). I am by no means as educated or experienced as many, but I’m working on it. And I like to share knowledge when I can. Ultimately my goal is to use my herbal and EO understanding to work in a free clinic type setting. Thanks for asking and if I ever can help, feel free to contact me.
Hi Aimee,
Wow! This is amazing! Thank you so much for taking the time to share your background!! You’re totally rawkin’ it! And I will definitely reach out if we continue to share more about essential oils!
What size jar did you use?
Hi Jodi, I usually store the rub in a 4-8oz jar!
2 question’s
* What does tablespoons x ounces mean?
* u say store “up to 6mos” yet also say u have had yours for 5years?
Hi Bonnie,
Are you outside of the US? Check out our Rawkstar Conversion Guide to help with the measurements!
https://simplegreensmoothies.com/app
And yes, Simple Green Smoothiesas had this vapor rub for AWHILE!! Because you only have to use a really small amount for major congestion benefits. But it really is best to swap out for a new jar after a few months.
Can this be used on a child with Tree Nut allergies?
Hi Nancy,
Tree allergies can be funky. It’s always best to check with your child’s allergist before using any coconut products.
Hi Jen ! Thank you ! This is a great idea also for the kids ! But the essential oils must be 100% pure 🙂 Do you know doterra ? It will be a pleasure for me to send you some samples 😉 please let me know xx
Hi Adriana,
Plant Therapy’s are! That’s why we love them so much! 🙂 But we’re always up for learning about different essential oils. Checking them out now!
What would you recommend to replace the coconut oil if there is an allergy to tree nuts?
You could use another carrier oil— like olive oil or avocado oil… yet I don’t know if that could work for you. I would check out the carrier oil options from Plant Therapy:
Can’t I just buy this little jar from you? 🙁 Looks like it would work great! Would love to use it on my little kiddos.
Oooooh— that would be fun to sell! Maybe one day I could make some and sell it. I could see it being a fun Farmer’s Market stand. DIY Home Remedies. 🙂